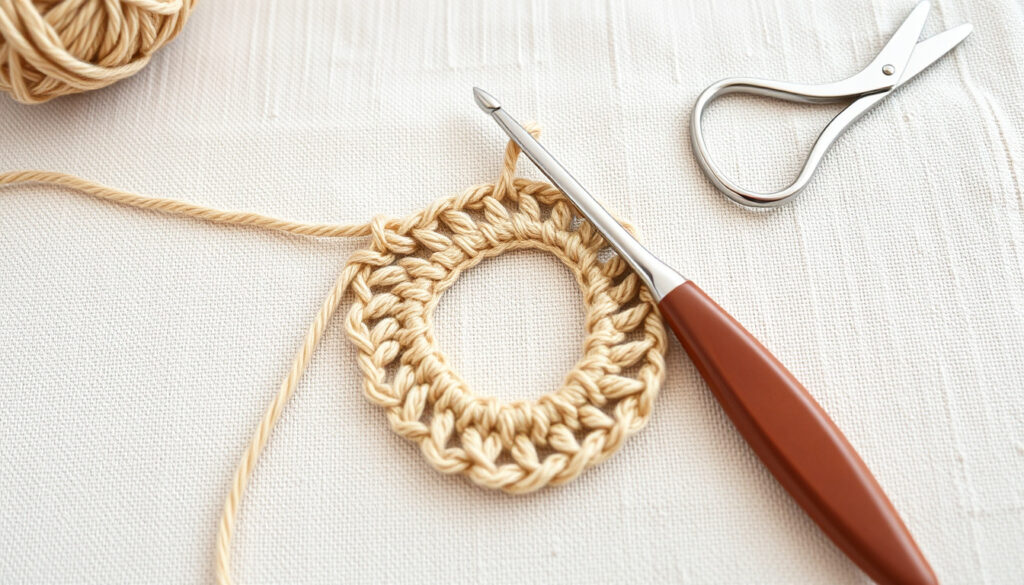
Magic Ring Crochet: Step-by-Step Tutorial for Beginners
If you’ve ever tried starting a crochet project in the round, you know the struggle of that stubborn hole in the center. The magic ring is the trick that eliminates it completely, giving you a tight, clean start every time – also called the magic circle or adjustable ring, it’s essential for amigurumi and any project worked in the round.
Alternative names: Magic circle, magic loop, adjustable ring · Typical steps: 4 (wrap, insert, yarn over, pull through) · Skill level: Beginner
Quick snapshot
- The magic ring is a technique to start crochet in the round without a hole (Crochet 365 Knit Too (crochet resource))
- It is widely used in amigurumi and other round projects (Octopus Crochet (tutorial site))
- The exact origin of the magic ring technique is not documented
- Whether the term “magic loop” originated in the UK or US remains unknown
- The effectiveness of the magic ring compared to the chain start for different yarn weights is not systematically tested
- Many beginner tutorials use six single crochet stitches as the typical first round (53 Stitches (crochet tutorial site))
- After tightening the ring, you can either join with a slip stitch or work in a spiral for amigurumi (Kirsten Holloway Designs (tutorial blog))
Four key attributes define the magic ring: its alternative names, difficulty, typical use, and origin.
| Attribute | Value |
|---|---|
| Also known as | Magic circle, magic loop, adjustable ring |
| Difficulty | Beginner |
| Typical use | Starting crochet in the round for amigurumi, hats, bags |
| Origin | Popularized in modern amigurumi patterns; exact origin unclear |
What is a magic ring in crocheting?
Why use a magic ring?
- The magic ring creates an adjustable loop that can be tightened to close the center hole completely (Crochet 365 Knit Too (crochet resource)).
- It’s the preferred start for amigurumi because it leaves no gap, unlike a chain-joined circle (Octopus Crochet (tutorial site)).
- When you pull the tail, the ring tightens around the first round of stitches, securing them in place.
Common names
- Besides “magic ring,” crocheters call it a magic circle, magic loop, or adjustable ring/loop (Crochet 365 Knit Too).
- In the UK, the terms are interchangeable, though “magic loop” is sometimes preferred for the same technique.
When to use
- The magic ring is essential for any project worked in the round from the center outward – especially amigurumi, hats, bags, and granny squares (Octopus Crochet).
- It works with any yarn weight and hook size, as long as the ring can be tightened easily.
The magic ring’s adjustability is its superpower. For amigurumi makers, it means no hole to sew shut later – a small detail that saves minutes per piece.
The implication: the magic ring’s adjustability makes it indispensable for seamless crochet projects.
How to crochet a magic ring step by step?
Required materials
- Yarn (any weight; smooth, light-colored yarn helps beginners see stitches) (53 Stitches).
- Crochet hook in a size appropriate for the yarn.
- Scissors and a tapestry needle for weaving in ends.
-
Step 1: Create the loop
- Hold the yarn tail and working yarn together, then wrap the working yarn around two or more fingers to form a circle. Beginners often use the finger method to keep the loop stable (YouTube: Magic Ring for Beginners (video tutorial)).
- Leave a tail long enough to weave in later – at least 6 inches (Kirsten Holloway Designs).
- Some tutorials create an X-like crossing of the working yarn over the tail before inserting the hook (YouTube: Magic Circle Crochet Tutorial).
-
Step 2: Insert hook and pull up loop
- Insert the hook from front to back into the loop, grab the working yarn, and pull it through. You now have a slip knot on the hook (Crochet 365 Knit Too).
- Chain 1 (or chain 3 if you’re starting with double crochet) (Crochet 365 Knit Too).
-
Step 3: Yarn over and pull through
- Work the required number of stitches into the ring. For beginning practice, many tutorials recommend six single crochet (53 Stitches).
- While working, hold the tail and the ring together to keep the loop from shifting (53 Stitches).
- Some demonstrations immediately start crocheting into the ring without an extra chain; both methods work (Pops de Milk (tutorial blog)).
-
Step 4: Tighten the ring
- Gently pull the yarn tail to close the ring. Pull slowly and steadily rather than with a hard tug to avoid snapping the yarn (YouTube: Easy Way to Do a MAGIC RING).
- The ring should close snugly, leaving no center hole.
- Do not cut the tail immediately – weave it in after the first few rounds to secure the closure (Kirsten Holloway Designs).
The pattern: four main steps – loop, hook, work stitches, tighten – form the core of every magic ring tutorial, no matter the language or yarn.
The verdict: mastering the four-step sequence at a moderate pace with a smooth yarn is the fastest path to a reliable magic ring. Amigurumi makers should focus on the six-sc start; hat makers can proceed directly to their stitch count.
How to do a magic ring crochet in the UK?
UK terminology differences
- UK crocheters use the same physical technique, but stitch names differ: UK double crochet (dc) equals US single crochet (sc). When a UK pattern says “work 6 dc into the magic ring,” it means 6 single crochet in US terms.
- The terms “magic ring”, “magic circle”, and “magic loop” are all used in the UK; no single label dominates.
Step-by-step UK method
- The steps are identical to the US method. The only difference is the abbreviation for the first stitch after the ring: UK patterns often say “chain 1 (counts as dc)”, while US patterns say “chain 1 (counts as sc)”.
- For double crochet (UK treble), some UK tutorials start with chain 3 instead of chain 1 (Crochet 365 Knit Too).
Common UK patterns
- Many popular UK amigurumi designers use the magic ring as standard. It appears in patterns from LoveCrafts (craft marketplace) and Yarnspirations (yarn brand).
- UK pattern testers often note that the magic ring is interchangeable with the US version – just watch the stitch acronyms.
The trade-off: UK and US crocheters share the same magic ring skill; the only extra step is mental translation of stitch names.
How to make a magic loop for beginners?
Beginner tips
- Keep the loop loose enough that you can easily pull the tail to close it after the first round (Crochet 365 Knit Too).
- Use a smooth, light-colored yarn so you can clearly see each stitch (53 Stitches).
- Pinch the tail and working yarn together while making the first stitches to keep the ring stable (53 Stitches).
- Practice on a flat surface first; later you can hold the work in your hand (Pops de Milk).
Common mistakes
- Pulling the tail too tight before finishing the first round – this makes it impossible to close the ring.
- Losing count of stitches: use stitch markers to track the first stitch.
- Cutting the tail too early: several tutorials warn that the center can come undone if the tail is clipped before being woven in (Kirsten Holloway Designs).
Practice exercises
- Make six single crochet into the ring, then pull the tail to close. Repeat until the motion feels automatic (53 Stitches).
- Try different stitch counts – 8, 10, 12 – to see how the ring looks when filled.
- Work the ring with two different yarn colors to contrast the loop and the stitches.
A loose ring that won’t close is almost always caused by pulling the tail before the stitches are fully on the hook. Work the stitches over both the loop and the tail, then tighten – never before.
The pattern: consistent practice with a smooth yarn and correct sequencing eliminates the most common beginner problems.
How to join a magic ring crochet?
Joining with a slip stitch
- After completing the first round, insert the hook into the first stitch of that round, yarn over, and pull through both loops on the hook (YouTube: Magic Circle Crochet Tutorial).
- This creates a closed round with a visible seam, ideal for projects that need a clear start point.
- Then tighten the magic ring again if necessary before weaving in the tail.
Continuing in the round
- For amigurumi, many crocheters work in a spiral without joining – just keep crocheting around (Octopus Crochet).
- Use a stitch marker to indicate the first stitch of each round.
- The spiral method avoids a visible seam and is standard in most amigurumi patterns.
Invisible join
- An invisible join is a technique where the last stitch is connected to the first stitch without a visible slip-stitch bump. It is often taught for projects where the seam would be noticeable, such as hats (Pops de Milk).
- After the final stitch, cut the yarn, pull the tail through the loop, and thread it through the top of the first stitch to mimic a stitch.
The catch: joining with a slip stitch is simpler but leaves a seam; the spiral method is seamless but requires careful counting. Your choice depends on the project’s aesthetic.
What We Know and What’s Uncertain
Confirmed facts
- Magic ring is a technique to start crochet in the round without a hole – used in amigurumi and hats.
- It tightens to close the center completely.
- Also called magic circle, magic loop, adjustable ring.
- The standard sequence is: loop, insert hook, pull through, chain 1, work stitches, tighten tail (Crochet 365 Knit Too).
What’s unclear
- Exact origin of the magic ring technique (no authoritative source documents its invention).
- Whether the term “magic loop” originated in the UK or US – both countries use both terms.
- Why some tutorials chain 1 and others immediately work stitches – no consensus on which is better.
The analysis: the magic ring’s core function is well-documented, but its historical and terminological details remain unresolved.
Expert Advice from the Community
The magic ring is essential for amigurumi because it lets you close the center completely. Without it, you’d have to sew a hole shut on every piece.
– Octopus Crochet (crochet designer and tutorial creator)
Never cut the tail after tightening. Weave it in after a few rounds, or the center can come undone. That’s the number one beginner mistake.
– Kirsten Holloway Designs (step‑by‑step crochet tutorial author)
A common method shown in video tutorials is to create an X‑like crossing of the working yarn over the tail before inserting the hook. That small twist helps keep the ring stable while you work.
– YouTube: Magic Circle Crochet Tutorial (beginner‑friendly video)
Your First Magic Ring: What It Means
Learning the magic ring is a small investment with a big payoff: no more loose center holes in your amigurumi, hats, or bags. For new crocheters, the choice to pick up this technique early means skipping a common frustration and moving straight to cleaner, more professional finishes. For amigurumi makers, the implication is clear: master the magic ring now, or spend extra time sewing later.
Related reading: How to Crochet a Magic Ring · Magic Ring Circle Tutorial
Frequently asked questions
What yarn is best for practicing a magic ring?
Smooth, light‑colored worsted weight yarn is best – it lets you see each stitch clearly. Avoid fluffy or dark yarn until you’ve mastered the motion (53 Stitches).
Can I use a magic ring with very chunky yarn?
Yes, but leave the loop looser than usual so the tail can still close the ring. Use a hook one size larger than recommended for the yarn to make tightening easier.
Why does my magic ring slip out after I start crocheting?
You likely didn’t pull the tail tightly enough or you cut the tail before weaving it in. Always weave the tail through the first round stitches after tightening (Kirsten Holloway Designs).
How do I count the stitches in a magic ring?
Use a stitch marker to mark the first stitch of the round. Count as you work, and after closing the ring, re‑count the visible loops on top.
Can I start a granny square with a magic ring?
Absolutely. The magic ring gives a solid center for granny squares, but you may need to chain 2 or 3 for the corners before working clusters.
How do I weave in the yarn tail after the magic ring?
Thread the tail onto a tapestry needle, weave it through the back of the stitches of the first round, and trim close. Do not cut the tail before weaving – that’s the most common reason rings come undone (Kirsten Holloway Designs).
More related posts
 Andrew Lincoln: Why He Left The Walking Dead and Returned
 Nora Fatehi Biography: Age, Height, and Relationship Status
 Alisha Boe: Real Name, Ethnicity, and Acting Career
 Neapolitan Ice Cream: Origin, Flavors, and Health Facts
 Dawn French: Marriages, Children, Health & Latest News
 Peter Phelps: Baywatch Actor, Wife Donna, and Current Life
 Harry and Meghan: Latest News, Status & Key Facts
 Emilio Estevez: Bio, Net Worth, and What He’s Doing Now